Posting Unity Assignments
Posting an assignment
So, you've completed a Unity assignment and need to post it to your website. What now?
STEP 1: Create a website (if you haven't)
- Before you begin, be sure to download the site template from your class site.
- Unzip the file (in Windows be careful you aren't working in a zipped folder).
- You should see something like this:

- This folder will be where you put all your work for the semester.
STEP 2: Build your WebGL project
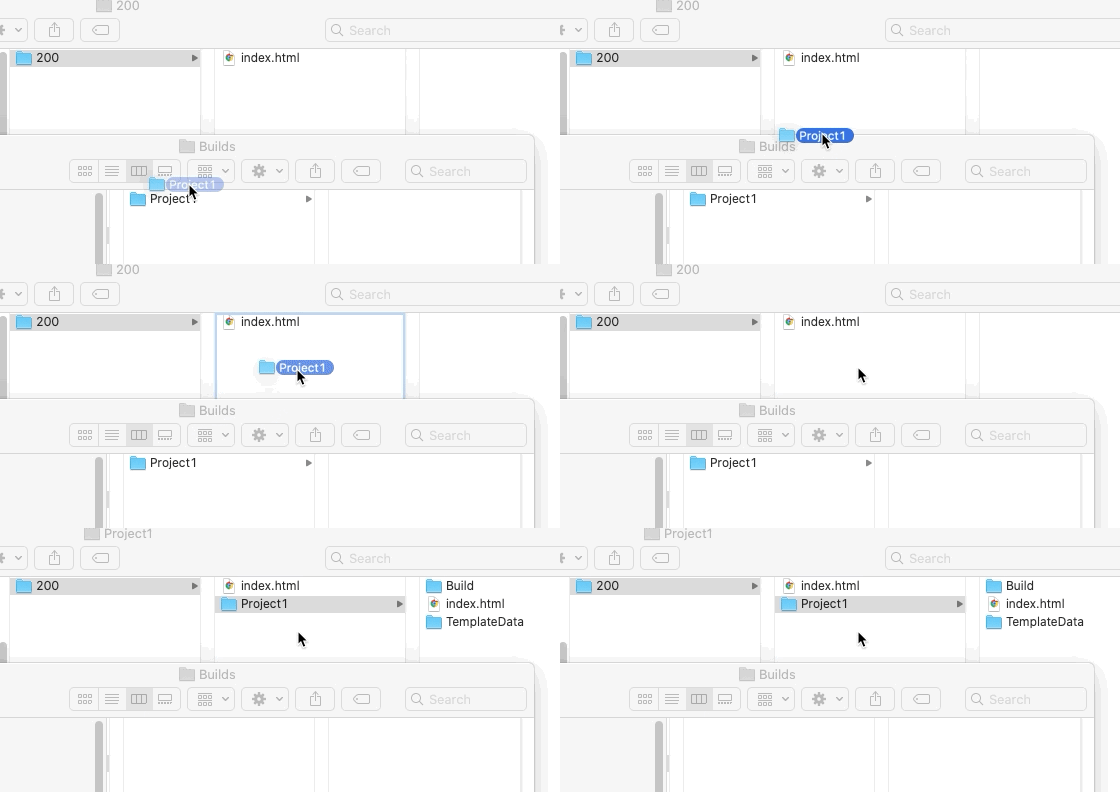
- After building your Unity project using WebGL, find the folder Unity just created.
- Drag that folder into your site folder:

- Do not touch or rename anything in this folder!
STEP 3: Link your work
- Add a link to your index.html (in your website folder, not your project folder) that will open your sketch. Do this by opening your the index.html file in a text editor.
- Add the folder name and a "/" to your HTML (i.e., in this case Project1). A properly formed link should look like this:
<a href="Project1/">Project 1</a><br>
- Save the file!
STEP 5: Update your site via FTP
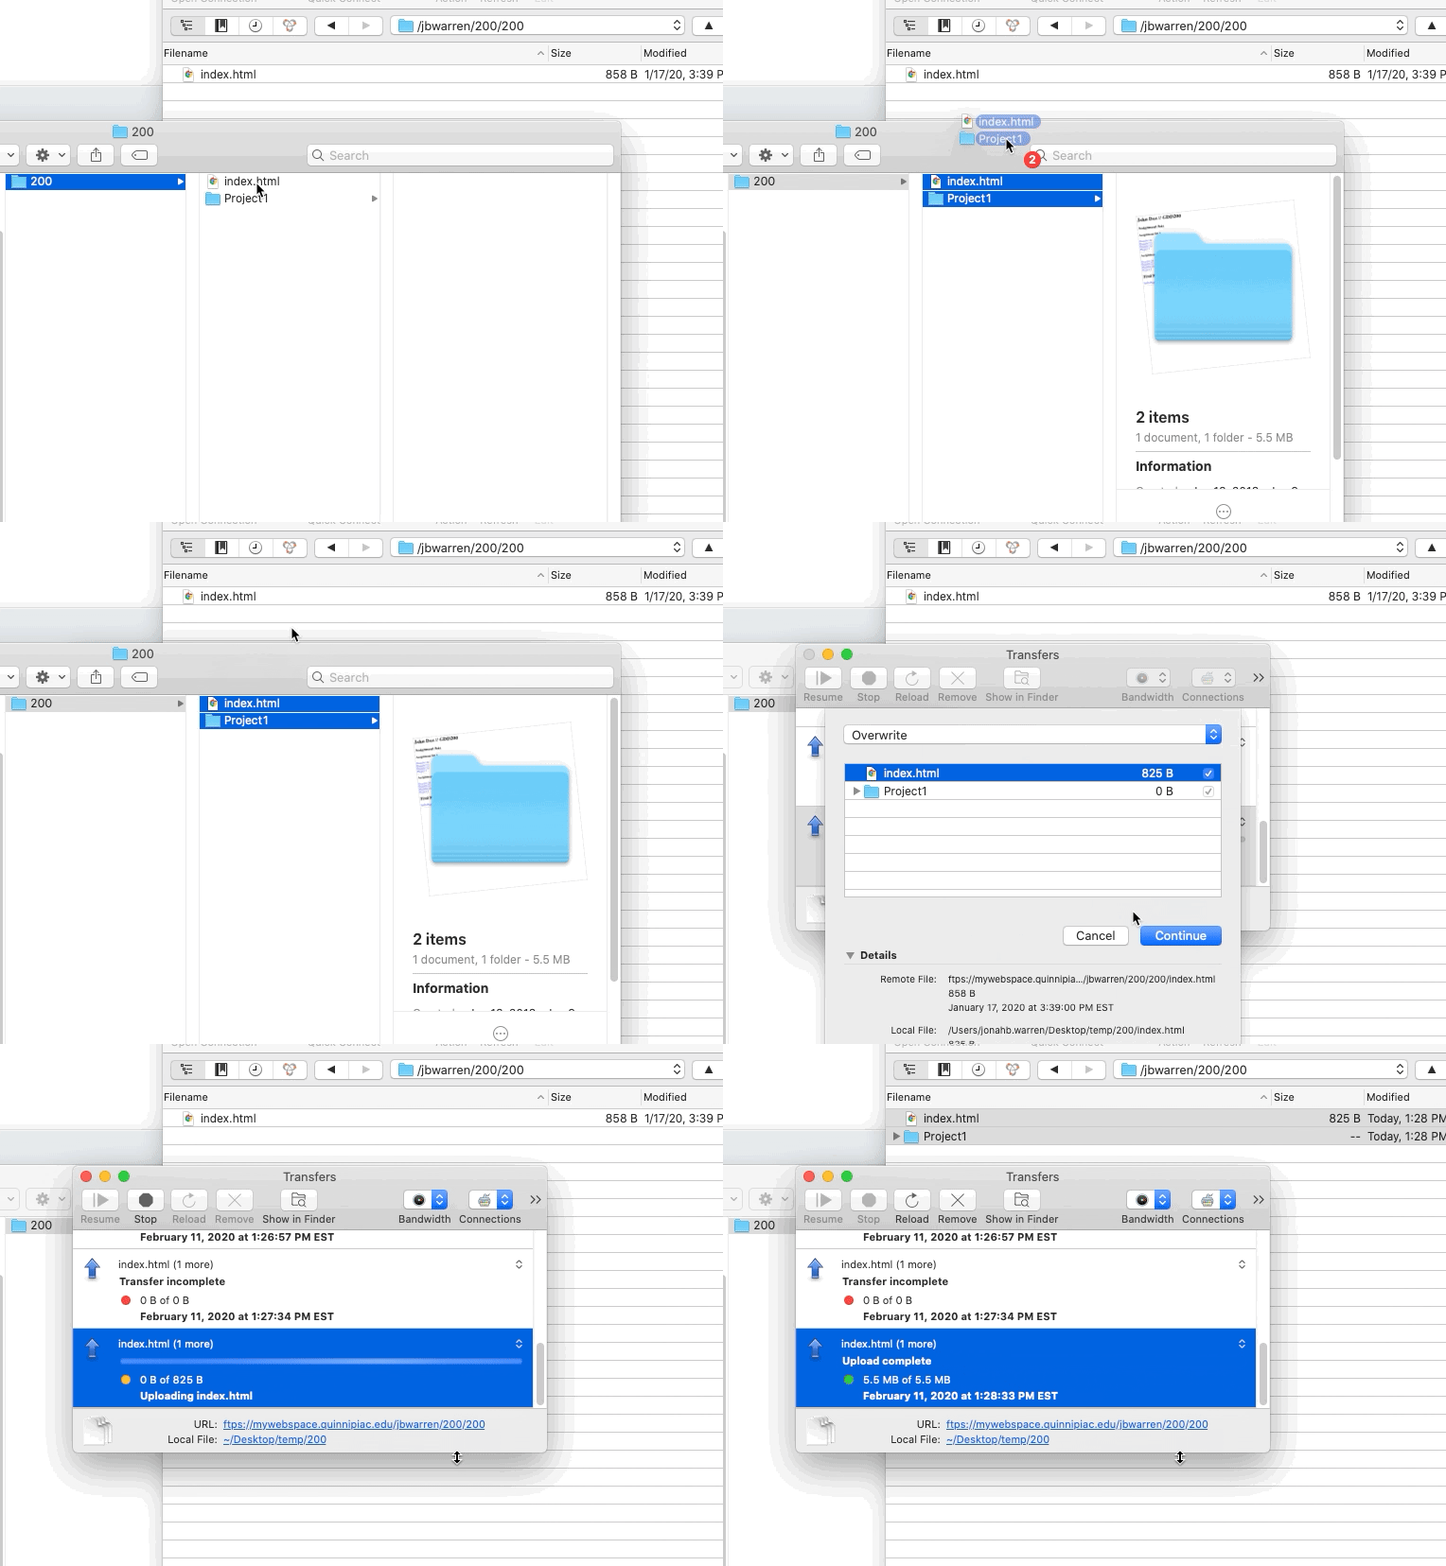
- Use Cyberduck or some other FTP program to update your class site on mywebspace so that it matches what you have locally. You will need to overwrite your index.html file. You will need to upload your project. If you need help, follow the instructions here. You can skip STEP 1.

STEP 6: Test the site
- Open a browser pointing at your class site (you can click on your name from the class website). Refresh the page and see if the link works.